Amazon Essentials Every First-Time Sourdough Baker Needs
Beginner bread baking amazon, easy sourdough tools, home bread baking essentials, amazon kitchen gadgets for bakers, fall baking tools amazon
Get Your Kitchen Ready for Sourdough Season: 15 Amazon Finds
There’s something magical about pulling a golden, crackly loaf of sourdough from the oven. The aroma fills your kitchen, the crust sings as it cools, and suddenly baking feels a little less like a chore and more like therapy. If you’ve been wanting to start your own sourdough journey, this is your sign to do it. With just a few essential tools and a bit of patience, you’ll be slicing into homemade bread in no time — and yes, you can find everything you need right on Amazon.
Getting Started: Building Your Starter
Every loaf of sourdough begins with a living, bubbling culture called a starter. It’s a simple mix of flour and water that ferments over time, capturing wild yeast from the air. The idea might sound intimidating, but it’s surprisingly easy once you get into a rhythm.
Start with a clean glass jar — something like a sourdough starter jar set that includes a lid and spatula makes things easier. Mix 1/2 cup of all-purpose flour with 1/4 cup of room-temperature water, stirring until smooth. Cover it loosely and leave it at room temperature for 24 hours. Each day for the next week, discard half the mixture and “feed” it again with fresh flour and water. By day five to seven, you’ll start to notice bubbles and a pleasant, tangy smell — that means your starter is alive and ready to bake with!
If you’re not sure your home environment is ideal for fermentation, don’t worry — keeping it in a warm spot (around 75°F) or using a proofing box can help the process along. You can even name your starter (many bakers do!) to make it more fun and personal.
Mixing Your First Dough
Once your starter is active, it’s time to make your dough. For beginners, stick with a simple recipe:
100g active starter
375g warm water
500g bread flour
10g salt
Using a digital kitchen scale is a must for accuracy — sourdough is all about ratios, and small differences can impact the final loaf. Start by mixing your starter and water in a large bowl, then add the flour and stir with a dough whisk until no dry bits remain. Cover and let the dough rest for 30 minutes (this rest is called autolyse and helps gluten develop naturally). After the rest, sprinkle in the salt and gently knead or “stretch and fold” the dough until incorporated.
The Magic of Folding and Resting
Unlike regular yeast bread, sourdough develops strength slowly. Over the next 2–3 hours, you’ll perform a series of “stretch and folds.” Simply grab one side of the dough, pull it up, and fold it over itself. Turn the bowl and repeat a few times every 30 minutes. This technique builds the gluten network without kneading and gives your bread that beautiful airy crumb.
After your final fold, cover the bowl and let the dough rise for about 4–6 hours, or until it’s puffy and slightly domed. Then transfer it to a lightly floured surface and shape it into a round ball. Place it in a proofing basket (banneton) dusted with flour to help it hold its shape while it rests overnight in the fridge. That long, cold proofing time is what gives sourdough its depth of flavor and chewy texture.
Baking Day
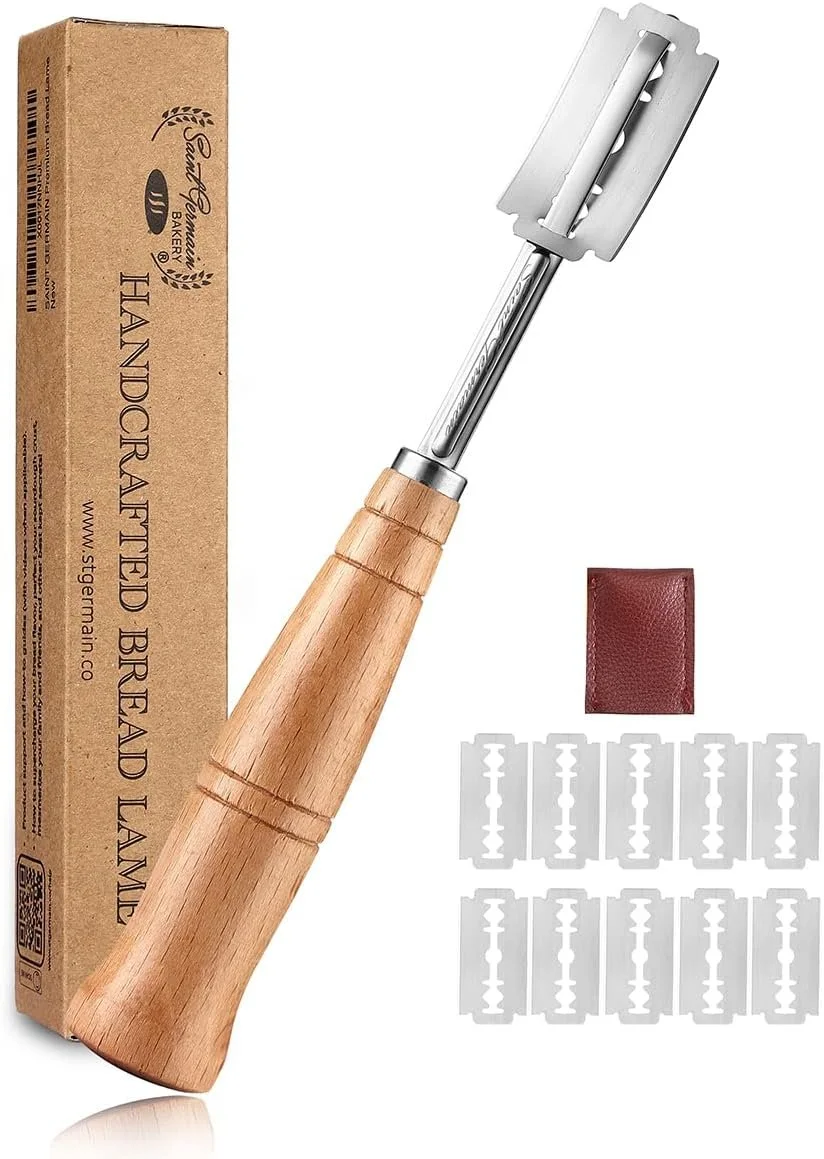
The next morning, preheat your oven to 475°F with a Dutch oven inside — this is key for that crispy crust. Once it’s hot, carefully transfer your dough from the fridge into the pot. Use a bread lame or razor to score the top — those little slashes control how your bread expands and make it look professional. Bake with the lid on for 20 minutes, then remove the lid and bake for another 25–30 minutes until the crust is deep golden brown.
When your loaf comes out, resist the urge to slice it immediately! Let it cool for at least an hour so the crumb can set. Then slice into it with a sharp bread knife, slather it with butter, and enjoy the reward of your patience.
Tips for Success
Keep your starter in the fridge and feed it once a week when not baking.
Use a bench scraper to handle sticky dough — it’ll make cleanup much easier.
A kitchen towel or bread bag helps keep your loaf fresh without trapping moisture.
Don’t worry if your first loaf isn’t perfect — each bake teaches you something new.
Sourdough baking is part science, part art, and part mindfulness practice. You’ll start noticing how temperature, hydration, and timing affect your bread. Before long, you’ll be experimenting with whole grains, toppings, or even cinnamon swirl loaves.
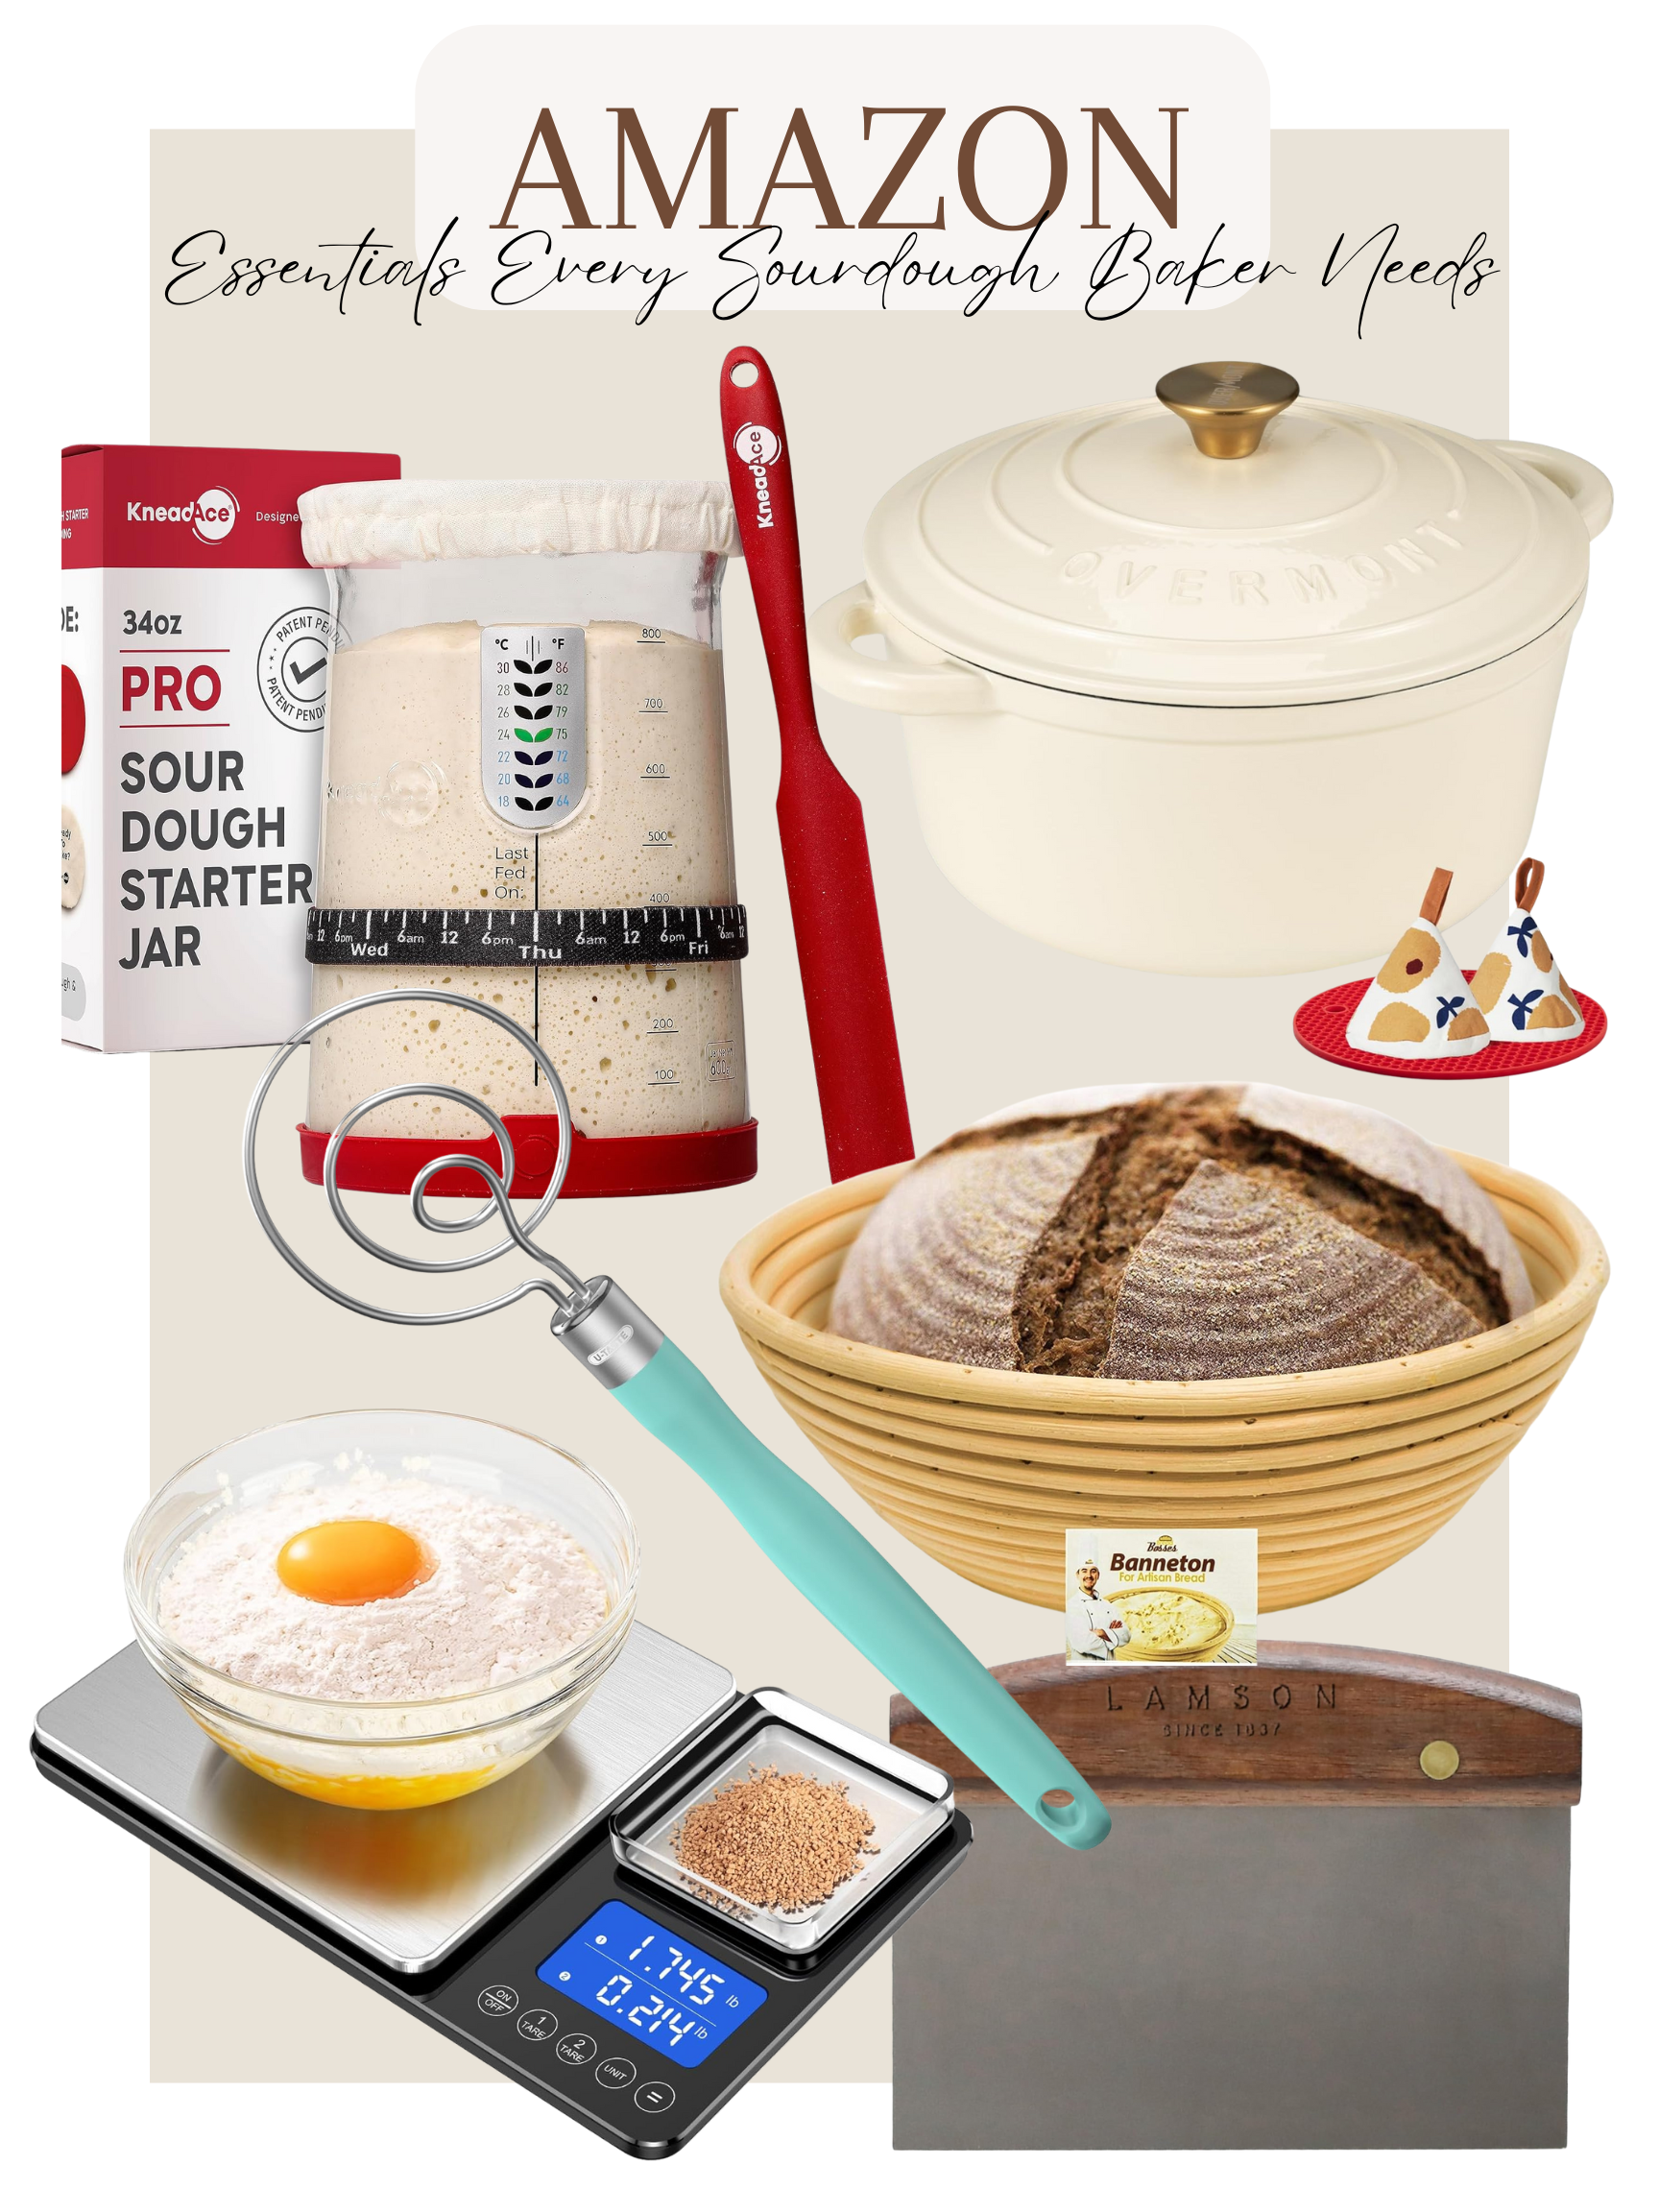
15 Amazon Finds to Make Sourdough Simple
Tap Each Image to Shop Item


Beginner bread baking amazon, easy sourdough tools, home bread baking essentials, amazon kitchen gadgets for bakers, fall baking tools amazon
Whether you’re baking your first loaf or your fiftieth, sourdough is one of those little rituals that makes home feel extra cozy. With the right tools and a bit of curiosity, your kitchen can easily become your new favorite bakery — no fancy equipment required, just a few smart Amazon finds and the patience to let nature (and yeast) do its thing.
Interested in shopping more of my favorite Amazon finds?
Check out all of my idea lists Amazon storefront here!